Table of Contents
- How to Make Your Own Face Oil
- Easy Homemade Face Oil Formulas
- Key Ingredients & Their Properties
- Blending & Application Guidelines
- The Master Formula for Cost-Effective DIY Face Oil
- Choosing a Carrier Oil Based on Your Skin Type and Budget
- The 2% Dilution Rule: Adding Essential Oils Safely
- The Financial Advantage: DIY vs. High-End Retail Brands
- Breakdown of Initial Investment Costs for Ingredients
- Cost Per Ounce Comparison: Making Your Own vs. Buying Luxury Serums
- Long-Term Savings: How Bulk Purchasing Reduces Your Beauty Budget
- Essential Ingredients for Every Skin Concern
- Step-by-Step Guide to Blending Your First Face Oil
- Common Mistakes That Waste Money and Ingredients
- Low-Cost Alternatives to DIY Face Oils
- Frequently Asked Questions About DIY Skincare ROI
- How Long Does a Homemade Face Oil Last Before It Expires?
- Can I Use Kitchen Oils Like Extra Virgin Olive Oil?
- Is DIY Skincare Actually Safer Than Lab-Tested Products?
If you’re tired of watching your monthly beauty budget evaporate into overpriced luxury serums that rely more on marketing than quality ingredients, taking control of your skincare routine is one of the smartest financial pivots you can make. This guide will show you how to formulate professional-grade face oils at a fraction of the retail cost, allowing you to customize your regimen without the high-end markup. Our analysis draws on current raw material market pricing and dermatological standards to ensure your DIY transition is both economically sound and physically effective.
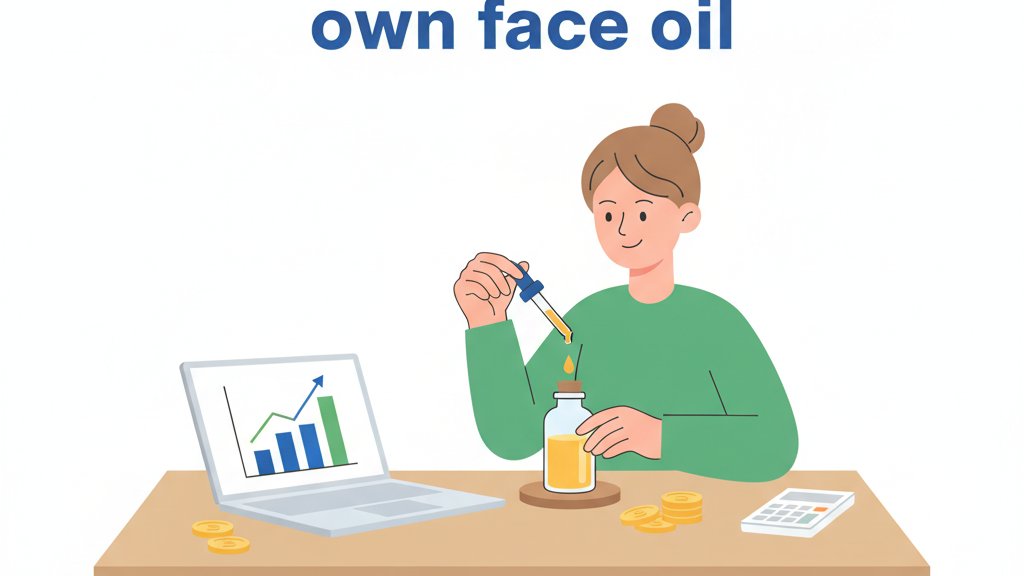
How to Make Your Own Face Oil
Craft a customized, radiance-enhancing homemade facial oil by combining a base carrier oil (such as jojoba, argan, or rosehip) with beneficial essential oils (such as lavender or frankincense) in a 2 oz dark glass bottle with a dropper. An easy formula includes 2 tablespoons of jojoba oil, 1 tablespoon of rosehip oil, and 4-6 drops of your chosen essential oils.
This video demonstrates how to create a simple DIY face oil:
Easy Homemade Face Oil Formulas
- Radiant & Moisturizing: 3/4 bottle of Argan oil, 1/4 bottle of Neem seed oil, 10 drops of Vitamin E, 5 drops of Lavender, 5 drops of Frankincense.
- Age-Defying & Mature Skin: 1/8 cup each of Carrot seed, Rosehip, and Jojoba oils, combined with 15-20 drops of Lavender or Rose essential oil.
- Basic Multi-Purpose: 2 tablespoons of Jojoba oil, 1 tablespoon of Rosehip seed oil, 4 drops of Lavender, 4 drops of Frankincense, 4 drops of Geranium.
- Light & Non-Greasy: 1 teaspoon each of Marula, Argan, and Baobab oils, 3 teaspoons of Jojoba oil, 4 drops of Vitamin E, and several drops of essential oils.
Key Ingredients & Their Properties
- Carrier Oils: Jojoba (regulates sebum), Rosehip (promotes regeneration), Argan (provides moisture), Grapeseed (minimizes pores).
- Essential Oils: Frankincense (fights aging), Lavender (soothes skin), Geranium (creates balance).
- Additives: Vitamin E oil (provides antioxidant protection and extends shelf life).
Blending & Application Guidelines
- Blending: Mix all components in a dark amber glass container to shield from light exposure, which can break down the oils.
- Application: Use 2-4 drops on cleansed, lightly dampened skin in the morning and evening.
- Shelf Life: Homemade facial oils typically remain effective for up to 12 months when kept in a cool, dark location.
- Safety: Perform a patch test on your inner forearm before use to ensure no allergic reaction occurs.
The Master Formula for Cost-Effective DIY Face Oil
To understand how to make your own face oil, you must first strip away the “prestige” branding and look at the raw chemistry. A high-quality face oil is essentially a two-part equation: a base (carrier) oil and targeted active ingredients (essential oils). The primary answer to achieving a professional result is to follow the 98:2 ratio. This means your blend should consist of approximately 98% carrier oil and no more than 2% essential oils. For a standard 1-ounce (30ml) glass dropper bottle, this translates to roughly 1 fluid ounce of base oil and 6 to 12 drops of essential oil total.
Immediately, you gain a financial advantage by controlling the concentration. While retail brands often dilute expensive actives to less than 0.5% to maximize profit margins, making your own allows you to hit the therapeutic “sweet spot” of 1-2% without increasing your cost basis significantly. Learning these practical skills is similar to discovering how to save money as a college student by opting for homemade alternatives over expensive store-bought brands. You should always start by pouring your carrier oil into a sterilized amber glass bottle, then adding your essential oils drop by drop, and finally rolling the bottle between your palms to incorporate the mixture without introducing air bubbles that cause oxidation.
Choosing a Carrier Oil Based on Your Skin Type and Budget
The “carrier” is your bulk ingredient, and choosing the right one is where you optimize your return on investment. If you have oily or acne-prone skin, look for oils high in linoleic acid, such as Grapeseed oil or Rosehip oil, which typically retail for $10–$15 per 4-ounce bottle. For dry or mature skin, heavier oils like Avocado or Sweet Almond oil provide a richer lipid barrier. From a financial perspective, Jojoba oil is often the “Goldilocks” choice for beginners; it is technically a liquid wax that mimics human sebum, has an incredibly long shelf life (reducing waste), and can be found for approximately $2.50 per ounce when bought in 8-ounce quantities.
The 2% Dilution Rule: Adding Essential Oils Safely
Safety is a form of financial protection—avoiding a chemical burn saves you a costly trip to the dermatologist. In the United States, the Tisserand Institute and other safety organizations recommend a 1% dilution for facial applications on sensitive skin and a maximum of 2% for normal skin. This means if you are making a 30ml bottle, 6 drops is a 1% dilution. Essential oils like Frankincense, Lavender, or Helichrysum are potent; using more does not provide “faster” results, it only increases the risk of sensitization and wastes expensive product. Understanding these safety protocols is as essential as following small business tips when managing your own production line at home.
The Financial Advantage: DIY vs. High-End Retail Brands
The price transparency in the skincare industry is notoriously low. A popular “luxury” face oil at a major U.S. retailer like Sephora can cost $72 for a 1-ounce bottle. When you analyze the ingredient list, the primary component is often Squalane or Jojoba oil. By purchasing these raw materials yourself, you can replicate or even improve upon the formula for a fraction of the price. You aren’t just paying for the oil at the store; you are paying for the glass bottle, the celebrity endorsement, the retail shelf space, and the 60-80% profit margin required to sustain a global brand.
| Product Category | Avg. Retail Price (1oz) | DIY Production Cost (1oz) | Annual Savings (6 units) |
|---|---|---|---|
| Luxury Brand (e.g., Vintner’s Daughter style) | $185.00 | $8.50 | $1,059.00 |
| Mid-Range Brand (e.g., Herbivore style) | $54.00 | $4.20 | $298.80 |
| Mass Market Natural (e.g., Burt’s Bees style) | $19.99 | $2.10 | $107.34 |
Breakdown of Initial Investment Costs for Ingredients
Let’s look at a real-world startup cost for a high-quality DIY kit purchased from a reputable U.S. supplier like Mountain Rose Herbs or a local health food store. A 4oz bottle of organic Jojoba oil costs roughly $14.00. A 0.5oz bottle of high-quality Lavender essential oil costs $12.00. A pack of six amber glass dropper bottles costs $10.00 on Amazon. Your total initial investment is $36.00. While this is higher than a single “drugstore” oil, this kit provides enough material to make 12 full bottles of face oil. This brings your cost per bottle down to just $3.00, compared to the $15–$70 you would spend at a retailer.
Example: Investing $36.00 upfront to produce 12 units of face oil results in a unit cost of $3.00. Compared to a mid-range retail price of $50.00, your total “repayment” to your own savings account over one year is $564.00. This kind of fiscal responsibility can be further supported by exploring side hustles to make extra money to fund your initial supplies.
Cost Per Ounce Comparison: Making Your Own vs. Buying Luxury Serums
To put this in perspective for a savvy consumer: buying a luxury serum at $72/oz means you are paying $1,152 per pint. Making your own at $3/oz means you are paying $48 per pint. Over a year, if you use one bottle every two months, the DIY route saves you $414. That is money that could be redirected into a high-yield savings account or used to pay down high-interest credit card debt. In financial terms, DIY skincare offers a “guaranteed return” through expense reduction that outperforms almost any market investment, much like building passive income ideas to secure your future.
Long-Term Savings: How Bulk Purchasing Reduces Your Beauty Budget
Once you have mastered your formula, purchasing carrier oils in 16oz or 32oz containers can drop your costs by another 20-30%. However, as a financial advisor would warn against over-leveraging, don’t over-buy oils with short shelf lives. Rosehip oil, for example, goes rancid in about 6 months. Only bulk-buy stable oils like Jojoba, Meadowfoam, or Squalane. Proper inventory management ensures that your “cost per use” remains at its absolute minimum without losing money to expired products.
Essential Ingredients for Every Skin Concern
When learning how to make your own face oil, you must act as your own product formulator. Different oils have different molecular weights and fatty acid profiles. To maximize the efficacy of your investment, you must match the ingredient to the “job” it’s performing. Using an expensive oil for the wrong skin type is a sunk cost that yields no aesthetic benefit.
- Grapeseed Oil: High in linoleic acid, ideal for acne-prone skin ($0.15/oz in bulk).
- Argan Oil: Rich in Vitamin E, best for anti-aging ($7.50/oz in bulk).
- Sweet Almond Oil: Hypoallergenic base for sensitive skin ($0.45/oz in bulk).
- Rosehip Seed Oil: Contains natural Vitamin A/retinol ($6.00/oz in bulk).
Step-by-Step Guide to Blending Your First Face Oil
- Sanitize your workspace and glass dropper bottles using 70% isopropyl alcohol.
- Fill the bottle 90% full (approx. 27ml) with your chosen carrier oil or oil blend.
- Add 6–12 drops of essential oils (1–2% dilution) using a glass pipette.
- Secure the cap and roll the bottle between your hands for 30 seconds to mix.
- Label the bottle with the ingredients and the “Manufactured Date.”
Important: Never use undiluted essential oils directly on the face. The cost of treating a chemical burn or severe allergic contact dermatitis far outweighs any savings gained from DIY experimentation.
Common Mistakes That Waste Money and Ingredients
The most common financial mistake in DIY skincare is “kitchen-sinking”—adding too many expensive ingredients at once. Your skin can only absorb so much. If you mix ten different essential oils, you aren’t getting ten times the benefit; you are simply creating a muddled formula where ingredients may counteract each other. Stick to one or two targeted actives to keep your costs predictable and your results measurable.
Low-Cost Alternatives to DIY Face Oils
While making your own is cost-effective, it isn’t the only way to save money on skincare. If you find the “startup cost” of buying several oils too high, consider these non-loan alternatives to achieve healthy skin on a budget:
- Pharmacy Brands: Brands like The Ordinary or Inkey List sell single-ingredient oils (like 100% Squalane) for $7–$10. If you only use one type of oil, it may be cheaper to buy these than to source your own bottles and bulk ingredients.
- Selling Unused Items: If you have a graveyard of half-used, expensive department store products, consider selling unopened items on platforms like Poshmark or Mercari to fund your DIY ingredients.
- Budget Restructuring: Instead of taking out a small “payday” loan for personal care items, use a “sinking fund” strategy. Set aside $5 a week in a dedicated envelope or high-yield savings sub-account specifically for your skincare supplies.
- Dietary Adjustments: Increasing your intake of Omega-3 fatty acids (found in cheap canned sardines or flaxseeds) can improve your skin’s natural oil production for free, reducing the amount of topical product you need to apply.
Frequently Asked Questions About DIY Skincare ROI
How Long Does a Homemade Face Oil Last Before It Expires?
Most DIY face oils last between 6 and 12 months. The “clock” starts the moment you open the bulk bottle of carrier oil. To extend this, you can add a few drops of Vitamin E oil (Tocopherol), which acts as a natural antioxidant, preventing the other oils from going rancid. This small addition is a “capital preservation” tactic for your skincare shelf.
Can I Use Kitchen Oils Like Extra Virgin Olive Oil?
While Olive oil is cheap, it has a high oleic acid content which can actually disrupt the skin barrier in some people, leading to more problems. However, Sunflower oil from the grocery store is often high-quality and very high in linoleic acid—just ensure it is organic and cold-pressed. Using “food grade” oils that meet these criteria is a legitimate way to source ingredients at “wholesale” prices.
Is DIY Skincare Actually Safer Than Lab-Tested Products?
Safe is a relative term. While you avoid synthetic fragrances and parabens, you are responsible for your own “quality control.” Commercial products contain preservatives that prevent mold and bacteria growth. Since oils do not contain water, they don’t typically grow mold, but they do oxidize. As long as you follow the dilution ratios and storage advice provided, DIY face oils are a safe, fiscally responsible alternative to the $500-billion global beauty industry.
By shifting from retail markups to the 98:2 DIY formulation model, you effectively secure an immediate 80% or greater return on your skincare investment. Your next step is to audit your current serum costs and allocate a small $40 startup fund to source high-quality bulk carrier oils, effectively neutralizing one of the most unnecessary leaks in your monthly budget.
Read more about related topics
- Fun Jobs That Pay Well: Exciting Careers With Great Salaries
- Richest Country in the World: Wealth Rankings and Economic Leaders
- Make Money Blogging: Your Complete Guide to Earning Online
- Best Budget Smartphones: Top Affordable Picks for Smart Shoppers
- Summer Jobs 2018: Your Complete Guide to Finding Seasonal Work
- Mortgage Rate Cap: Your Shield Against Rising Interest Payments

This is exactly what I’ve been looking for! I was comparing the cost of a popular argan oil serum last month and was shocked by the markup. Making my own seems so much more sensible financially. Does anyone have experience using neem oil for acne-prone skin specifically? I’m a bit hesitant about its strong scent.
Hi Sarah, thanks for your comment! Neem oil can be potent, so starting with a lower concentration and observing your skin’s reaction is wise. Diluting it well in carrier oils will help mitigate the scent and any potential irritation. Many find it very effective for blemishes when used thoughtfully.
I tried making a face oil a while back and loved how easy it was. I found that buying essential oils in small quantities from reputable online suppliers was still a bit of an investment, but the carrier oils were definitely budget-friendly. I think the key is finding a good balance and not going overboard with expensive EOs right away. My skin has never been clearer!
This is a fantastic idea for saving money. I’m always mindful of my beauty budget, and this guide makes it seem so achievable. My main concern is shelf life – how long do these homemade oils typically last before they go bad? I’m worried about wasting ingredients too.
Great question, Emily! To maximize shelf life, store your face oils in dark glass bottles away from direct sunlight and heat. When using fresh, high-quality ingredients and proper storage, most DIY face oils can last for 6-12 months. Using Vitamin E as an antioxidant can also help extend their stability.
I’ve been intrigued by DIY skincare but always figured it’d be complicated or I’d mess it up. The formulas you’ve provided look really straightforward though. I’m particularly interested in the ‘Age-Defying & Mature Skin’ blend. I was wondering if adding a tiny bit of a more potent essential oil, like helichrysum, would be beneficial or just overkill?